Provisioning service account for Live Hub
Instructions in this section require administrative access to your Microsoft account and permissions to configure your organization’s Azure Entra ID. If you lack such permissions, forward these instructions to your IT administrator to complete them on your behalf. When done, your IT administrator should provide you with a username and password of a provisioned Live Hub service account, so that you will be able to log in to while performing during the following steps.
Live Hub needs a dedicated service account with proper permissions to be able to manage your Teams tenant. Service account provisioning consists of the following steps:
-
Creating a service account for Live Hub.
-
Assigning proper administrator roles to the Live Hub service account.
-
Excluding Live Hub service account from conditional access rules that force session re-authentication.
-
Configuring Live Hub service account as admin consents reviewer (optional).
To create a service account for Live Hub:
-
Log in as a user with a Customer Administrator or Global Administrator role.
-
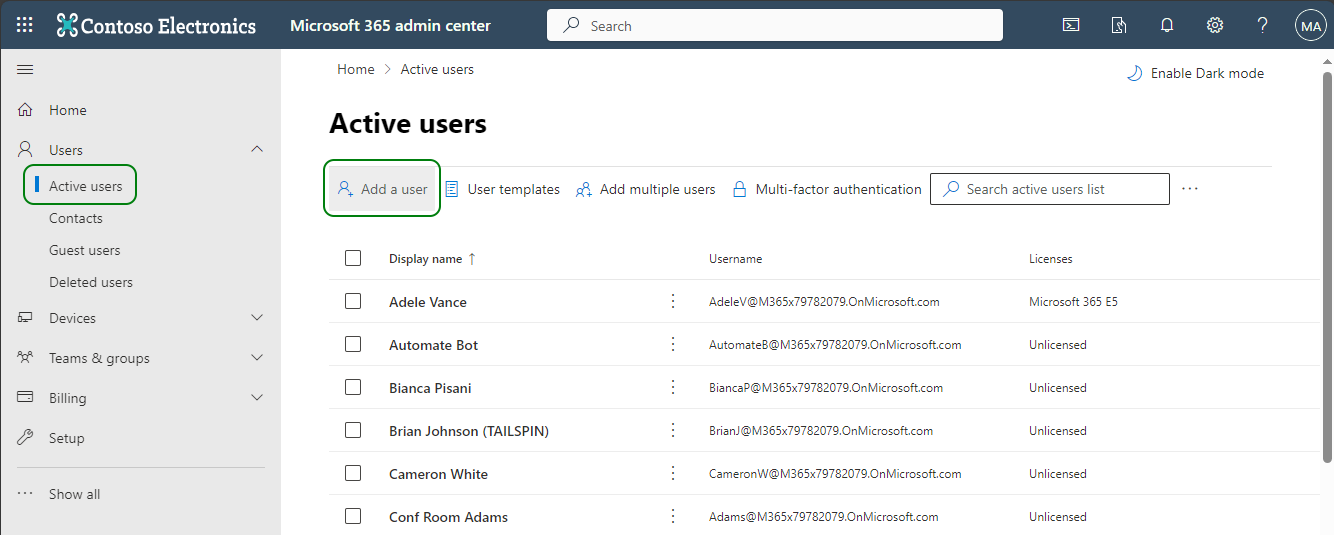
In the navigation menu pane, select Users > Active Users, and then click Add a User.
-
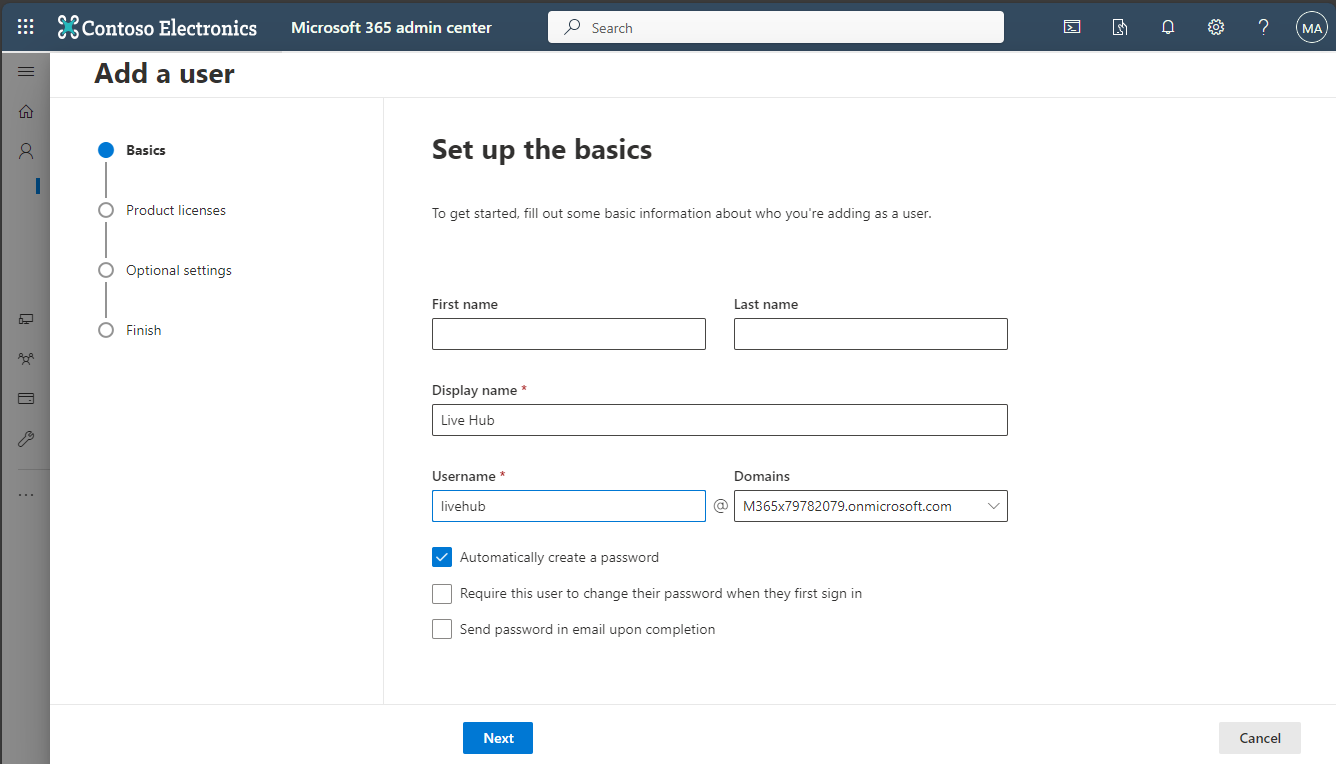
In the Add a user > Basic pane, enter the following:
-
In the 'Display name' field, enter Live Hub.
-
In the 'Username' field, enter livehub.
-
Clear the 'Require this user to change password when they first sign in' check box.
-
Click Next.
-
-
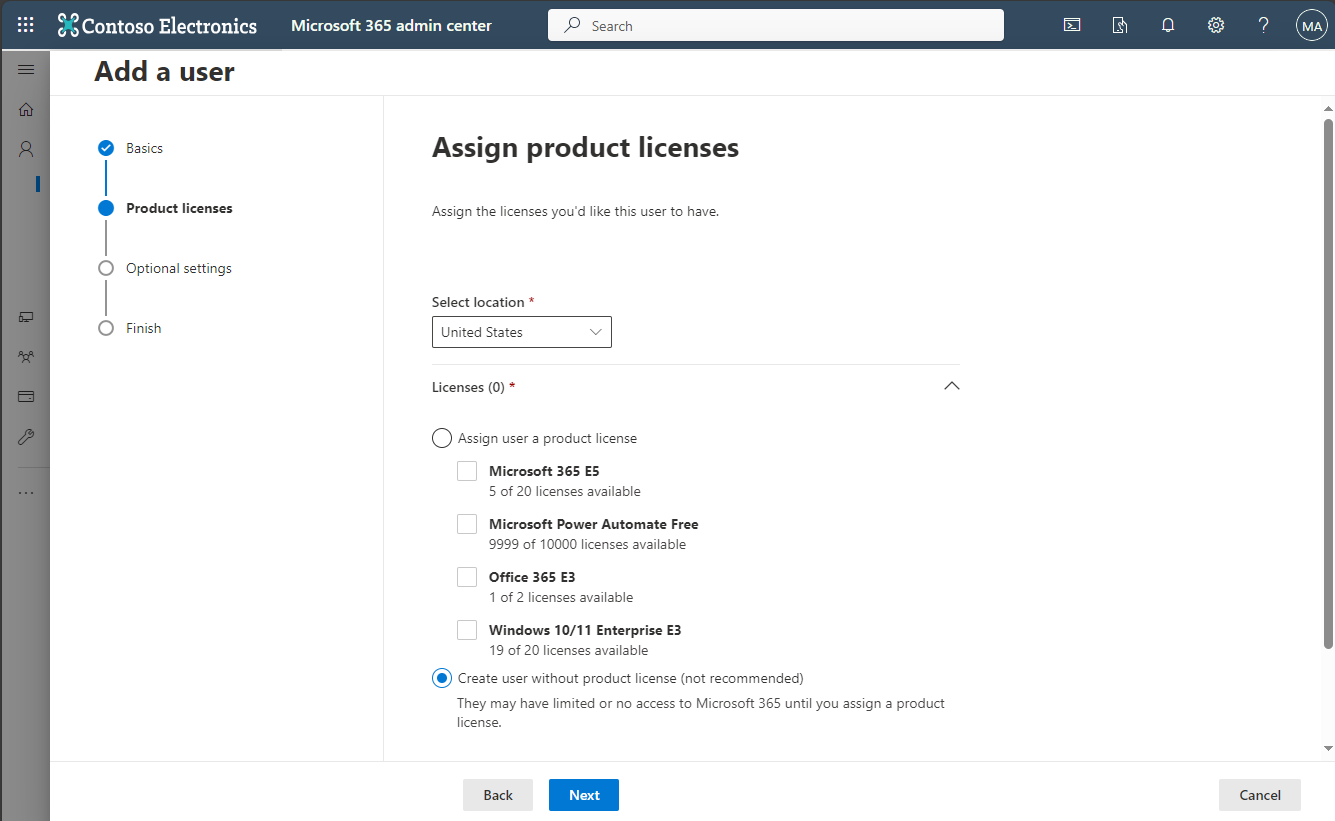
In the Add a user > Product licenses pane, select Create user without product license, and then click Next.
-
In the Add a user > Optional settings pane, click Next.
-
In the Add a user > Finish pane, click Finish adding.
-
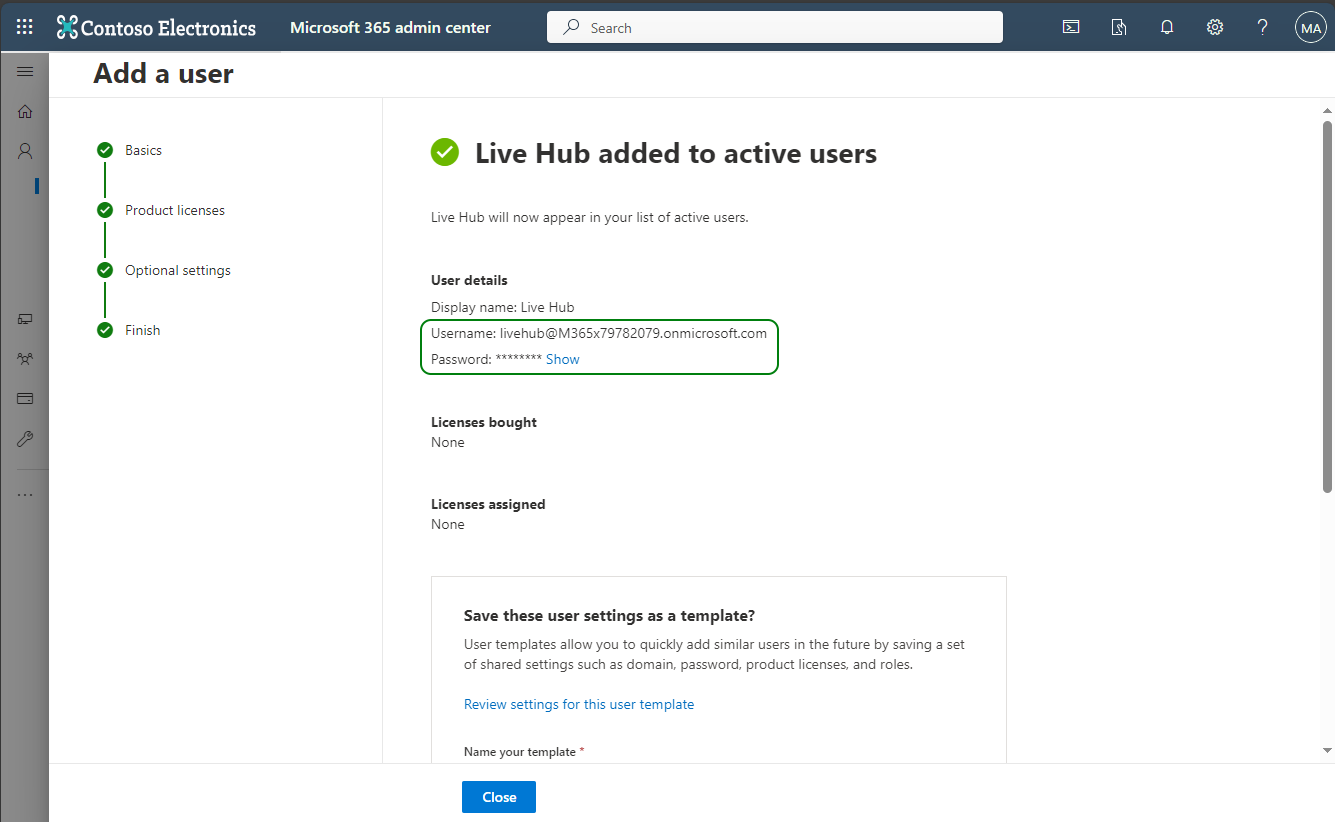
When the operation is complete, the following screen is displayed. Use the Show button to view the auto-generated password. Write down the username and password so that you will be able to use them for future logins.
-
Now you need to assign the following administrator roles to the newly created account:
|
Role |
Type |
Comment |
|---|---|---|
| Skype for Business Administrator |
mandatory |
Required for normal Live Hub operation. |
| Teams Communication Administrator |
mandatory |
Required for normal Live Hub operation. |
| Application Administrator |
recommended |
Required for Teams Tenant connection establishment and can be removed afterwards. Alternatively, you may configure Live Hub service account as admin consents reviewer, as described below. |
| Domain Name Administrator |
mandatory |
Required for adding Teams Connection and can be removed afterwards. |
| User Administrator |
mandatory |
Required for adding Teams Connection and can be removed afterwards. |
To assign Live Hub service account administrator roles:
-
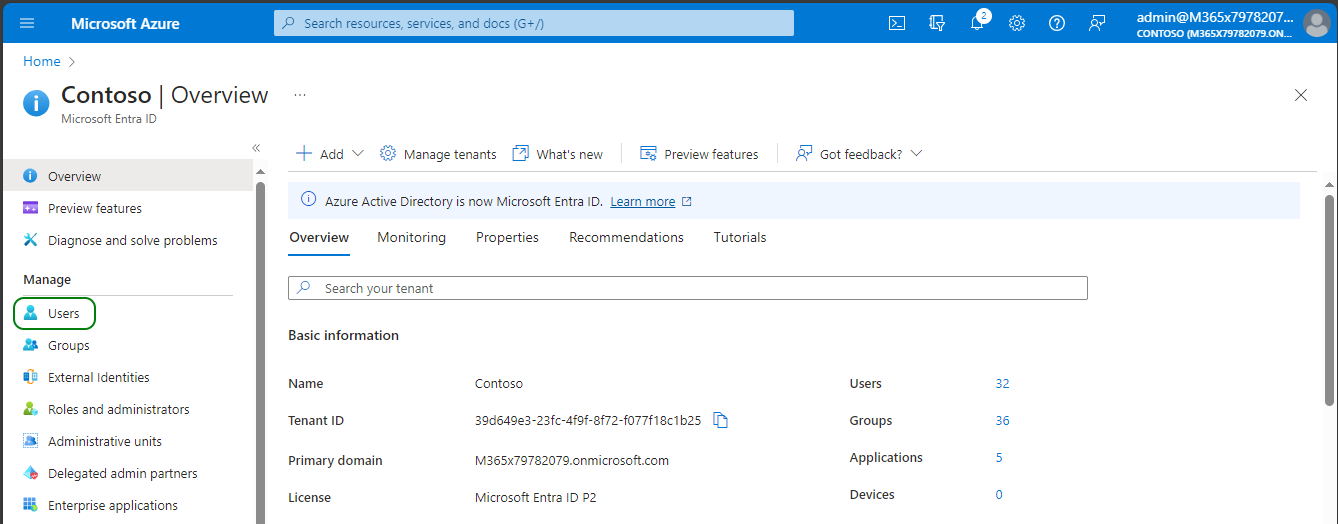
Open the Azure portal.
-
Log in as a user with a Customer Admin role (e.g., as Global Administrator).
-
In the Search box, enter “Entra ID”, and then open the Microsoft Entra ID screen.
-
In the navigation menu pane, select Users.
-
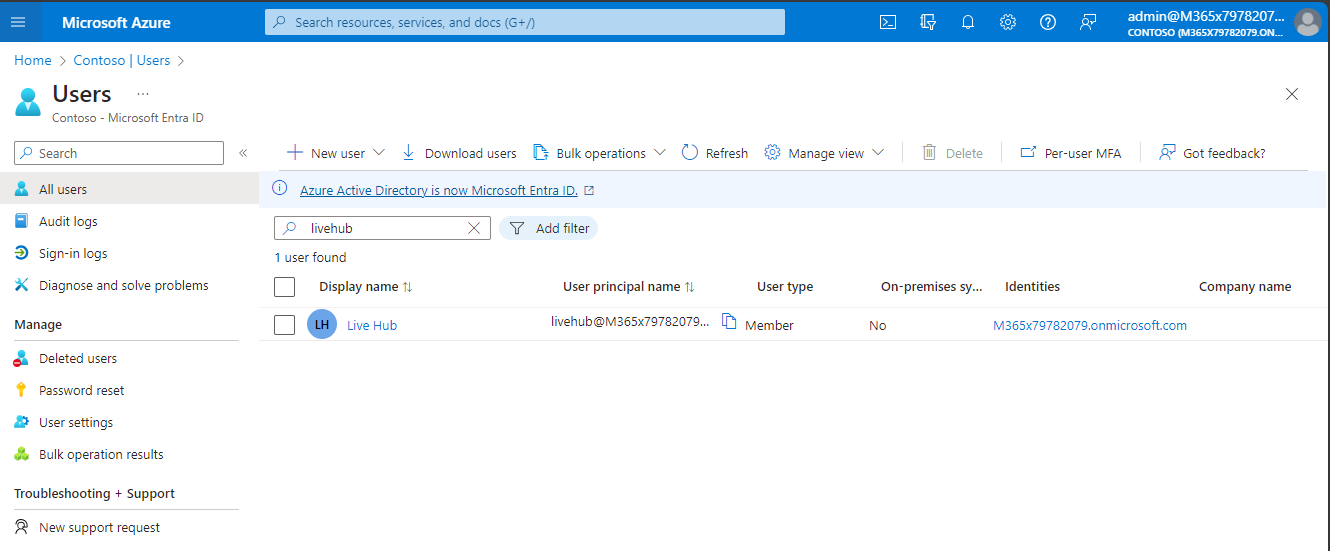
On the Users screen, enter "livehub" in the Search bar, and then select the Live Hub service account.
-
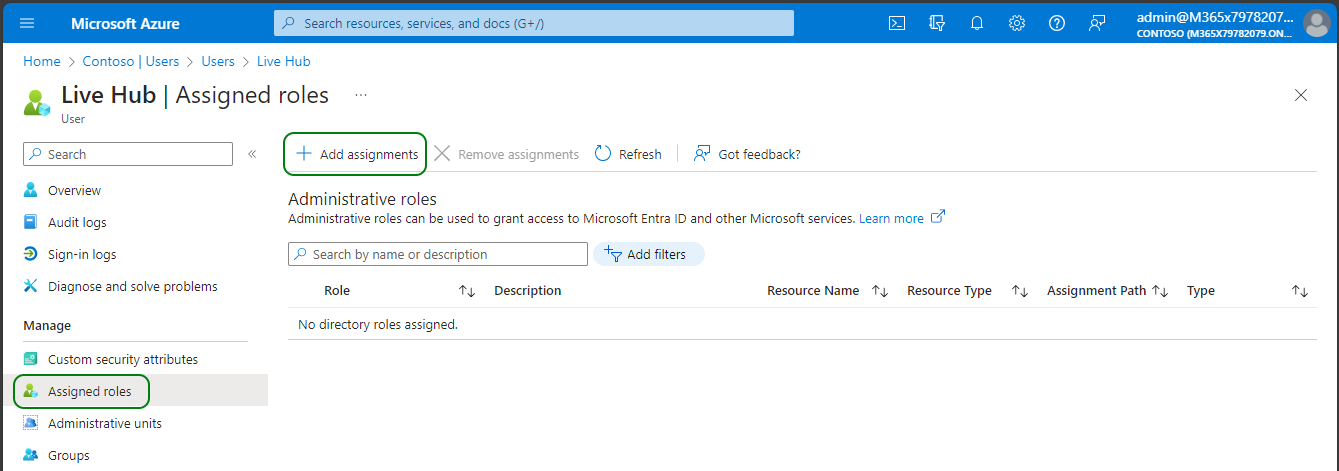
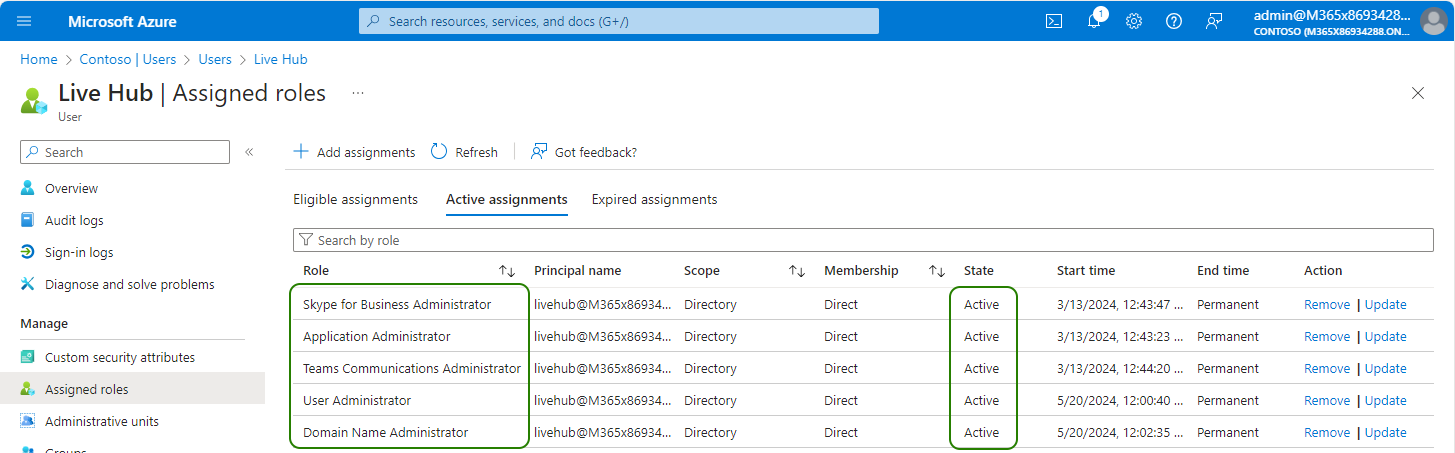
On the navigation pane, select Assigned roles, and then click Add assignments.
-
Select the following roles and then click Add:
-
Skype for Business Administrator
-
Teams Communication Administrator
-
Application Administrator
-
Domain Name Administrator
-
User Administrator
-
-
Click Refresh, and then verify that all roles were successfully assigned to the Live Hub service account and are Active.
Now you need to configure the Live Hub service account to be excluded from the Conditional Access rules that force session re-authentication.
This step is mandatory. Failure to implement it causes Live Hub platform’s token invalidation. As a result of that, Live Hub will be unable to connect to your Teams tenant after certain period of time.
To configure Live Hub service account to be excluded from the Conditional Access rules that force session reauthentication:
-
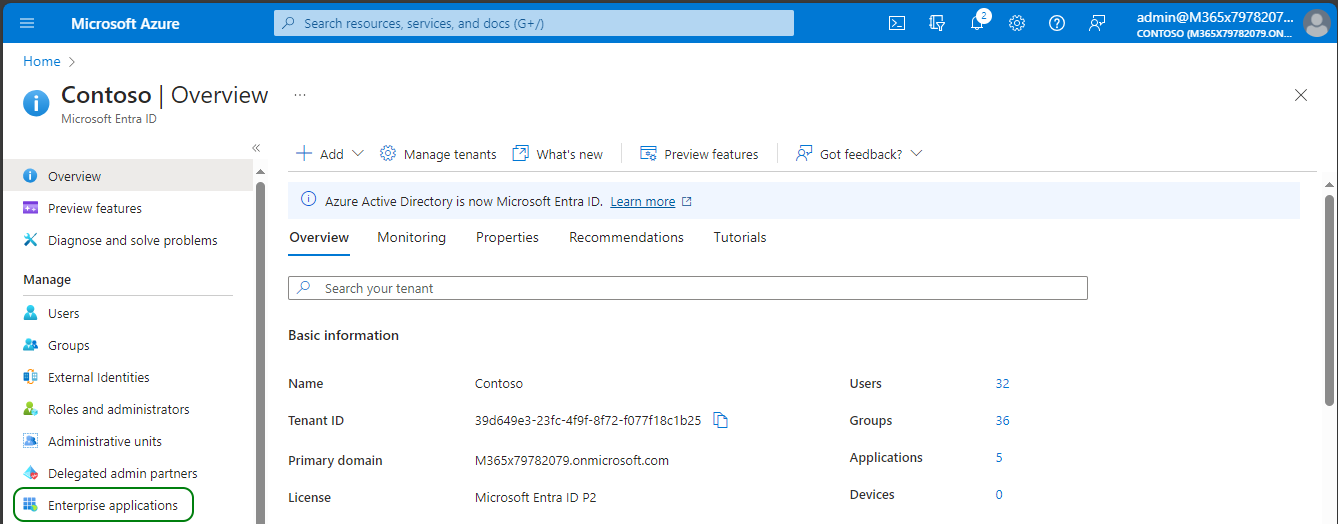
Go back to the Microsoft Entra ID screen. On the navigation pane, select Enterprise applications. Alternatively, you may navigate to the same screen by searching for “Enterprise applications” in Azure portal’s global search bar.
-
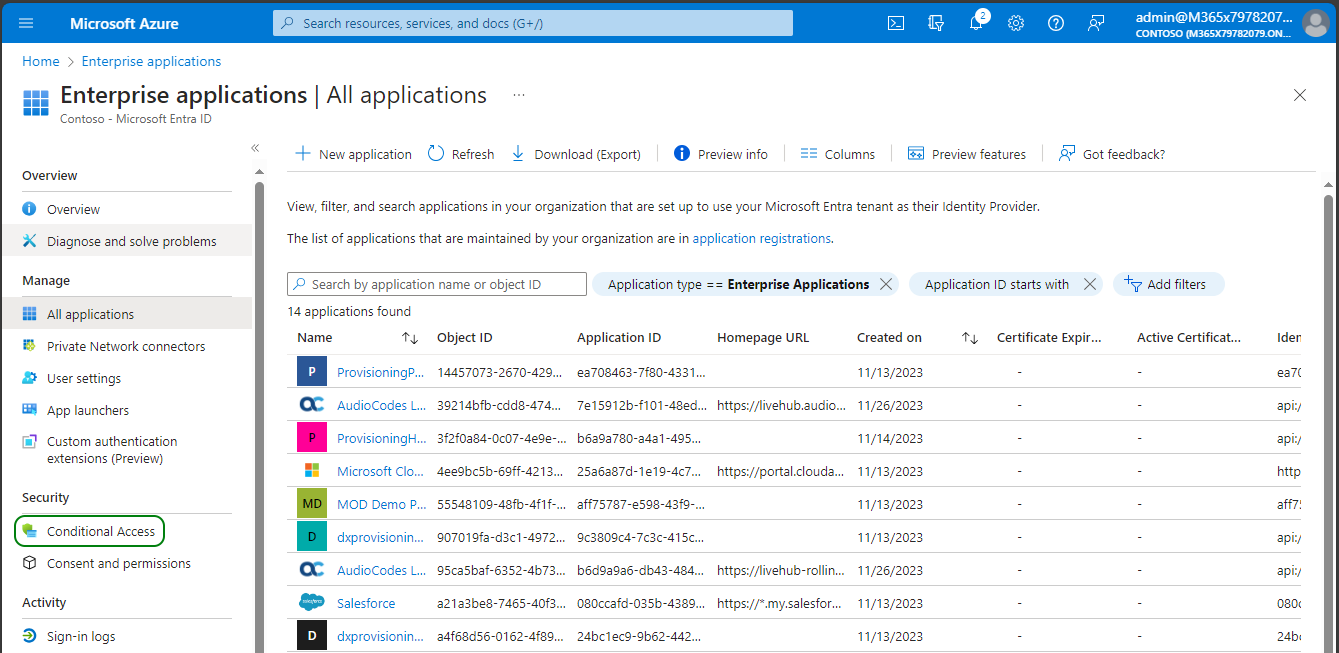
On the navigation pane, select Conditional Access.
-
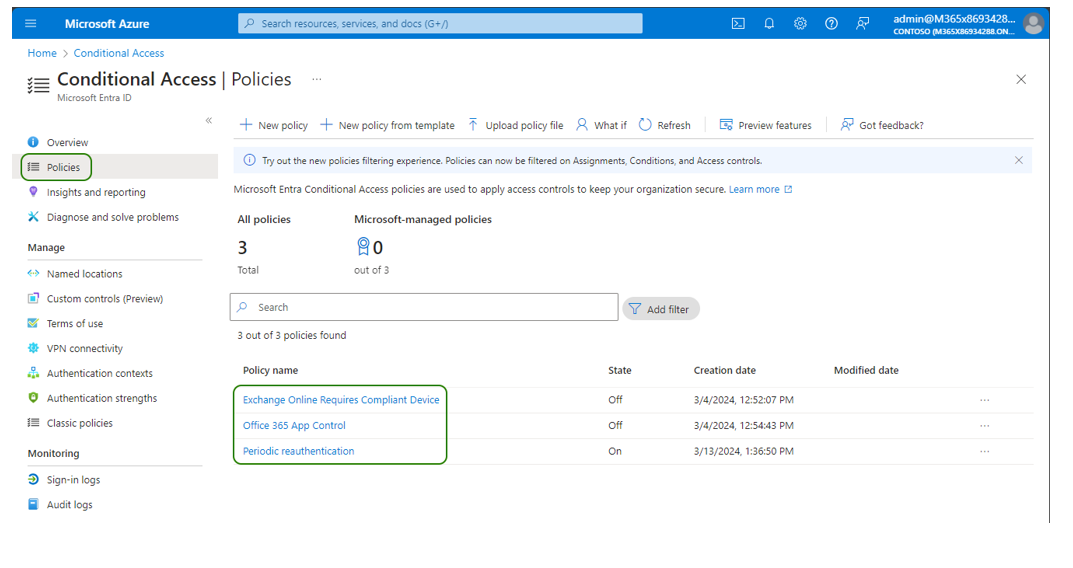
On the Policies screen, click on each configured policy.
-
Check whether one of the following options is configured under Access controls > Sessions:
-
Sign in frequency
-
Persistent browser session
-
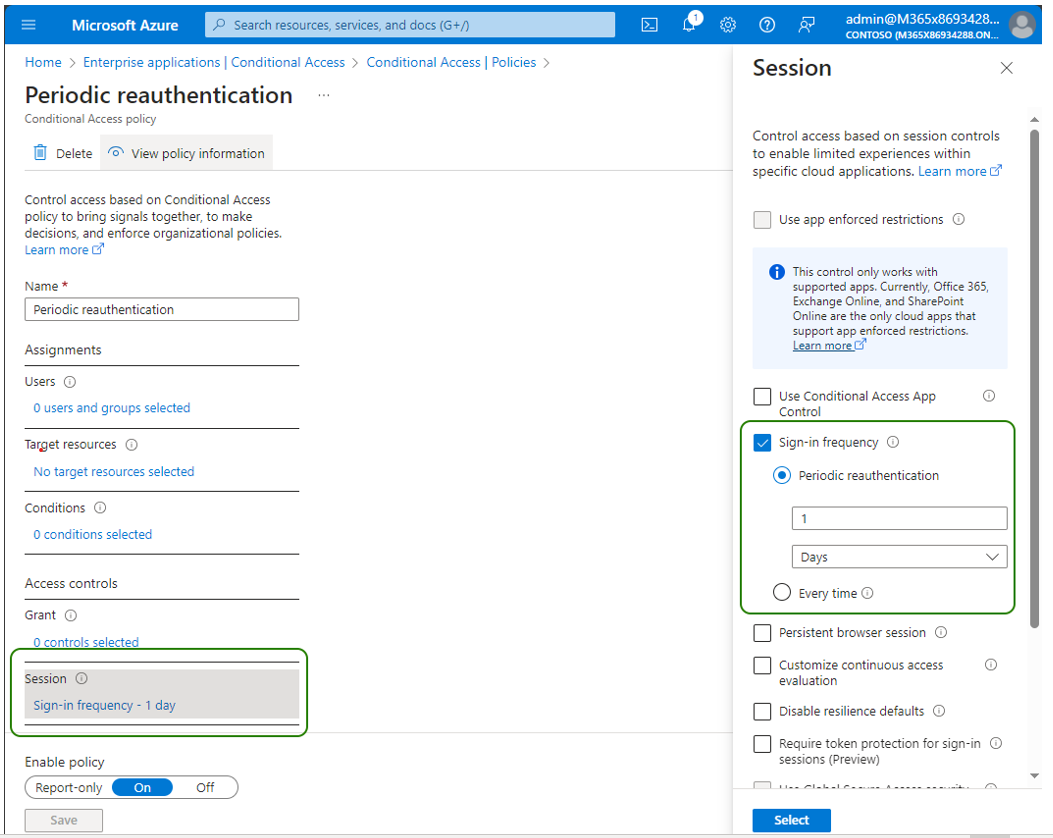
-
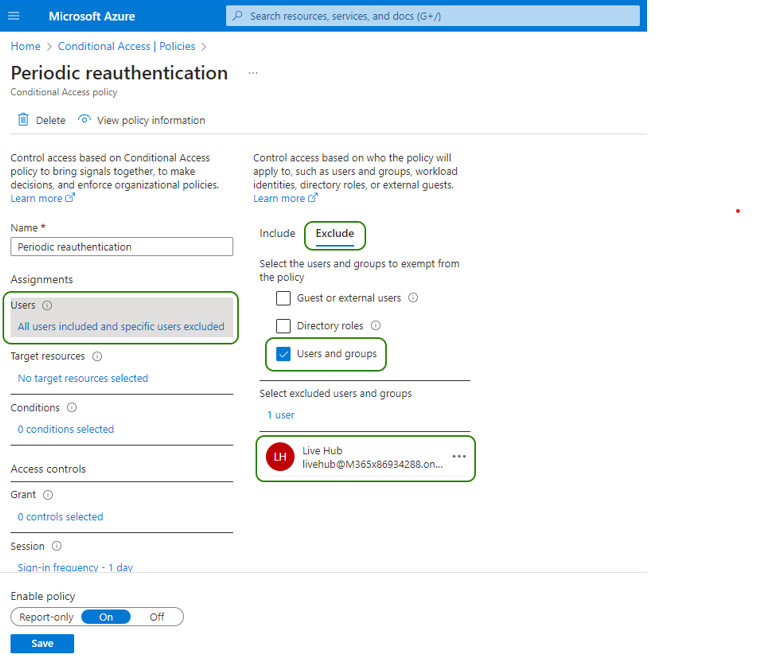
If yes, in the Users section, configure the Live Hub service account to be excluded from the policy.
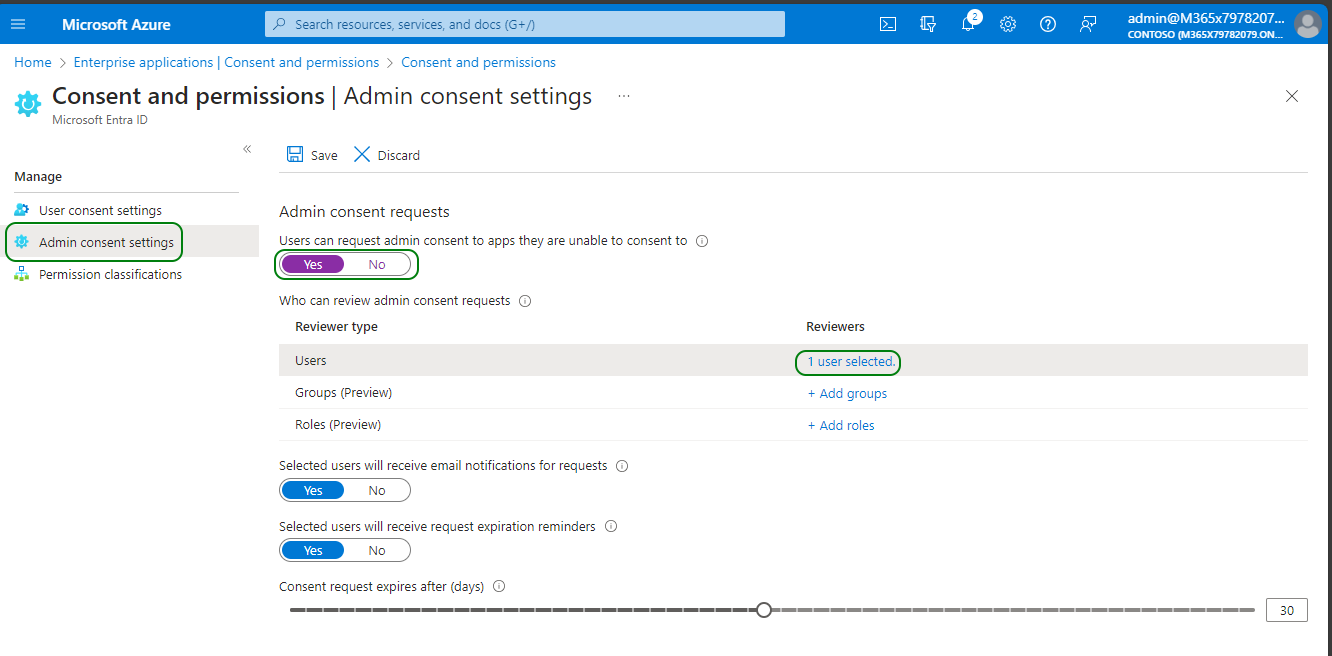
If you have decided not to grant Application Administrator role to Live Hub service account, you now need to configure it as an admin consents reviewer.
This step is not needed if you have an assigned Application Administrator role to the Live Hub service account.
To configure Live Hub service account as admin consents reviewer:
-
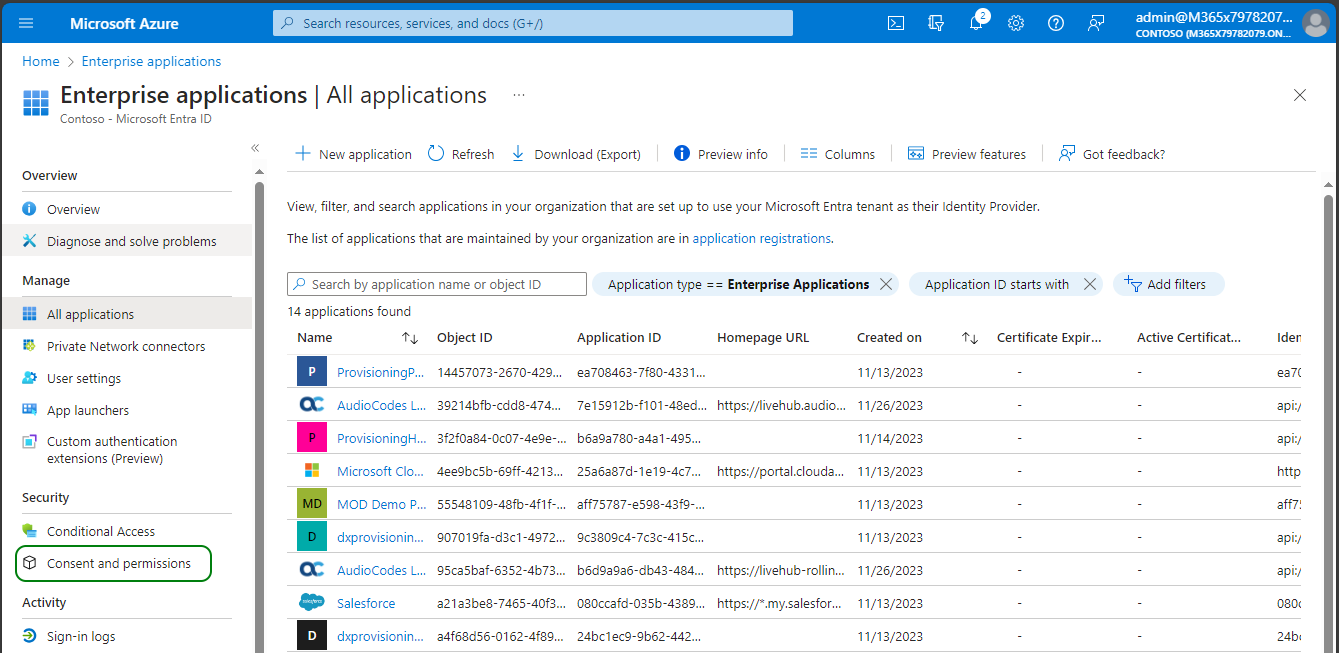
Go back to the Microsoft Entra ID screen. On the navigation pane, select Enterprise applications. Alternatively you may navigate to the same screen by searching for “Enterprise applications” in Azure portal’s global search bar.

-
In the navigation pane, select Consent and permissions.
-
On the navigation pane, select Admin consent settings.
-
Set Admin consent requests to Yes
-
Click Add user under Reviewers, and then select the Live Hub service account.
-
Click Save to save the changes.
-